Selling your home is a long process. From finding the right realtor to navigating offers and counteroffers, the entire journey can seem like a rollercoaster of never-ending tasks. One of the most important things you can do to ensure the sale goes off without a hitch is to have your home professionally inspected.

What Is a Home Inspection & How Do They Work?
Two home inspections are required when selling: the pre-inspection (also known as the seller’s inspection) and the regular home inspection (also known as the buyer’s inspection).
What Is a Pre-Inspection for Homes?
Sellers should have a pre-inspection before listing their home on the market. This is a proactive way to identify potential issues that could affect the sale.
A certified home inspector will perform this assessment, examining the home’s major systems and structural components. This includes:
- Structural Elements: Foundation, walls, roof, and attic
- Systems: Electrical, plumbing, and HVAC
- Exterior: Siding, windows, doors, and landscaping
- Interior: Floors, ceilings, walls, and other appliances
By uncovering and addressing problems early, sellers can make necessary repairs or renovations, enhancing the property’s appeal to potential buyers and increasing its market value.
Additionally, a pre-inspection report can be shared with prospective buyers, providing transparency and creating trust. This can expedite the sales process by reducing the likelihood of last-minute surprises that could derail negotiations or lower the selling price.
What Is a Buyer’s Home Inspection?
A buyer’s home inspection is a crucial step in the home-buying process and is usually completed after an offer is accepted. It allows the buyer to thoroughly assess the property’s condition through a professional inspector’s detailed examination. The inspection identifies any issues to help the buyer determine if they want to proceed with the purchase, renegotiate terms, or back out entirely. This ensures the buyer makes an informed decision so they can avoid buyer’s regret down the road from unexpected costs and other problems.
Since a third party is completing the inspection and has the buyer’s interest in mind, sellers need to get a pre-inspection to avoid any roadblocks in the selling process.
Why Are Home Inspections Important When Selling?
Home inspections provide transparency to potential buyers during the selling process. By identifying problems upfront, sellers can address them before listing the property, making the selling and closing process easier.
Offering a pre-inspection report to potential buyers can build trust and confidence in the property. Buyers appreciate knowing that the home has been thoroughly inspected and any issues have been disclosed. This transparency creates a sense of honesty and reliability, making the property more appealing and the transaction smoother. Having a well-maintained house with a clean inspection report is also more attractive to buyers, and you may even sell at a higher price because of it.
Additionally, disclosing known issues can protect you from future legal disputes. If buyers discover undisclosed problems after the sale, they might pursue legal action. By being transparent about the property’s condition from the beginning, sellers can mitigate this risk, ensuring a smoother transaction and safeguarding their interests.
What to Expect During the Home Inspection Process
As a seller, being prepared and informed about each step of a home inspection can help you navigate this crucial part of the selling journey. Understanding these steps and incorporating home inspection tips for sellers can significantly affect the outcome and ease of the inspection.
- Scheduling the Inspection: Once a buyer’s offer is accepted, they typically schedule a home inspection within a specified timeframe, usually within a week or two. Sellers are informed of the date and time.
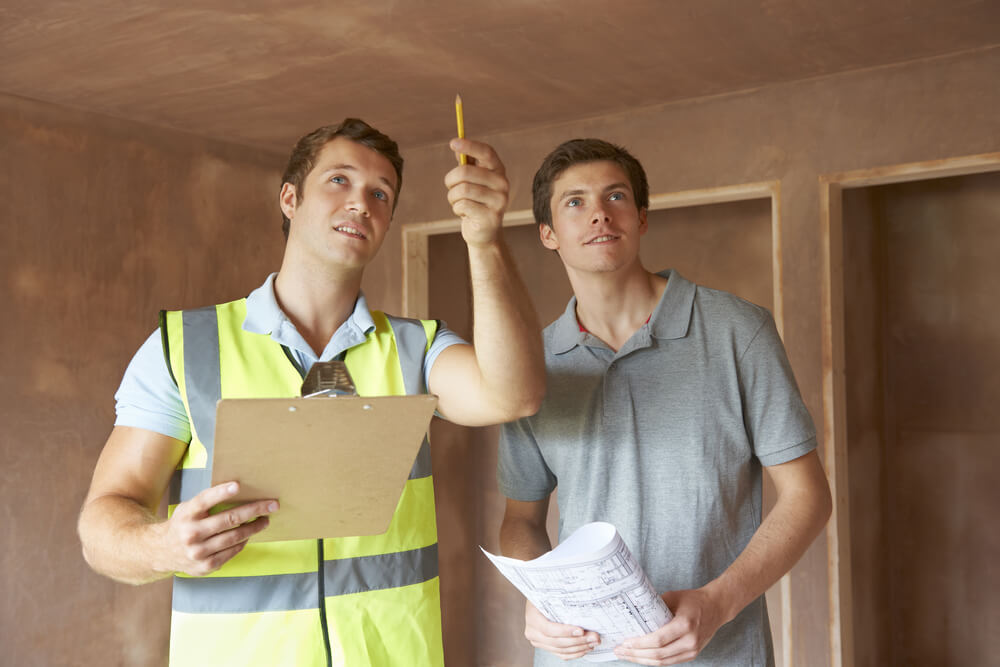
- The Inspection: The inspector will evaluate the home’s components by taking notes and photographs. They will look for structural issues, safety hazards, and signs of damage or wear. The inspector might also test appliances and systems to ensure they function correctly. This process can take anywhere from two to four hours, depending on the size and condition of the home.
- Inspector’s Report: After the inspection, the inspector will compile their findings into a detailed report. This report includes descriptions of any issues found, photos, and recommendations for repairs or further investigation.
- Review and Negotiation: The buyer will review the completed inspection report and decide how to proceed. They might request repairs, ask for a price reduction, or even withdraw their offer if significant issues are discovered. As a seller, you should be prepared to negotiate based on the findings.
- Repair and Resolution: If the buyer requests repairs, you can choose to address them yourself, offer a lower price, or negotiate a different resolution. It’s essential to handle these negotiations professionally to keep the sale moving forward.
Home Inspection Checklist for Sellers: How to Prepare Your Home
To make this process easier for you, we have created three home inspection checklists to follow when selling your home.
Before the Inspection:
- Clean and Declutter: A clean, clutter-free home makes it easier for the inspector to do their job. Ensure all areas of the home are accessible, including the attic, basement, and crawl spaces.
- Make Necessary Repairs: Address obvious issues that could be flagged during the inspection. This might include fixing leaky faucets, replacing broken windows, repairing damaged walls, and ensuring all systems are in working order.
- Check Safety Devices: Ensure all smoke detectors, carbon monoxide detectors, and other emergency systems are functioning correctly. Replace batteries if necessary.
- Service Appliances and Systems: Have your HVAC system serviced, clean or replace filters, and ensure all appliances are in good working condition.
- Check for Pests: Address any pest issues by removing unwanted guests from your home. That can mean laying traps, disinfecting contaminated areas, and hiring a professional exterminator if necessary.
- Documentation: Gather all relevant documents, such as warranties, receipts for repairs and maintenance, and any previous inspection reports. Having these on hand can provide valuable information to the inspector and buyer.
On Inspection Day:
- Be Prepared to Leave: Plan for you, your family, and your pets to be away from the home during the inspection. This allows the inspector to work without interruption and the buyer to feel comfortable asking questions.
- Ensure Access: Make sure keys and access codes are available for any locked areas, such as garages, sheds, or electrical panels. Unlock gates and ensure the inspector can access all parts of the property.
- Provide Utilities: Ensure all utilities (electricity, water, and gas) are turned on so the inspector can test systems and appliances.
After the Inspection:
- Review Findings: Once the inspection is complete, review the report carefully. Understand the issues identified and their potential impact on the sale.
- Plan for Repairs: If repairs are requested, decide how you will address them. Consider getting estimates from professionals if significant work is needed.
- Communicate with the Buyer: Maintain open communication with the buyer and their agent. Respond to requests and be willing to negotiate to keep the sale on track.
- Keep Documentation Updated: Update your documentation to include any repairs or maintenance performed as a result of the inspection. This can be useful for future reference and transparency.
Do you need help navigating the home inspection process? Local realtor Judy Michaelis works with sellers in the Westport, Connecticut, area. Contact Judy today if you’re ready to list your home.